Download Pattern
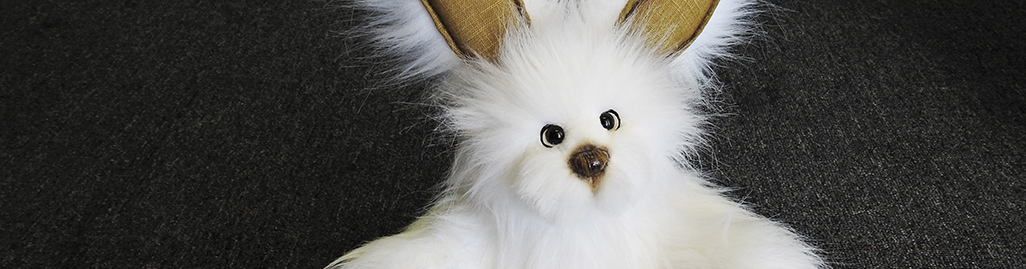
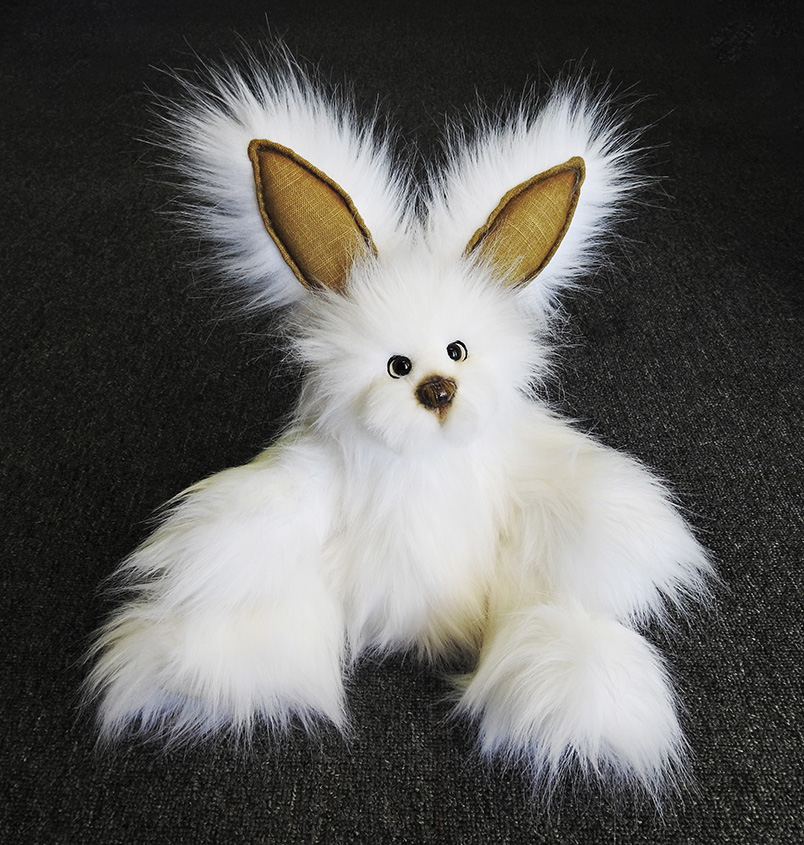
To start off with, I decided to make the bunny out of easy obtainable items found in your nearest Spotlight store. He has been made with a white synthetic fabric with contrasting linen fabrics to add a little colour and personality. There’s no rules to type of fabric you make your bears and rabbits, it’s all according to your taste – faux fur, mohair or strong cotton fabric … one colour or multiple. The main thing is to have fun with it.
When using fur fabrics, please be aware of the direction on the fur. The pattern pieces have been marked to show the direction they should go and whether the pattern needs to be reversed.
As for preparing the fabric before sewing, I’m a fan of anti-fraying the edges, no matter what fabric I am using – better to be safe than sorry. For those who do decide to use antifray, tracing your pattern pieces on fabrics with pen can make the ink run, so when using a light fabric, a lead pencil is ideal.
What you will need:
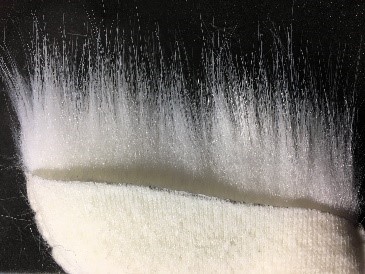
- WHITE FOX FUR – OPTIC WHITE – this fabric is very good quality and has little stretch.This fabric is 148cm in length, I used around 30cm but if your inexperienced maybe purchase 40cm to be sure. (I purchased my Fabric from Spotlight)
- Contrasting fabric if desired*
- Good quality cotton for sewing
- Upholstery cotton for heavy duty tasks
- Embroidery cotton for the nose
- Polyester filling for stuffing
- Sharp pointed scissors for cutting
- Narrow long nose pliers
- Doll needle
- Needles and pins
- Leather or felt for the backing of the eyes ( optional )
- Cardboard for template ( optional )
- 12mm hooped glass eyes
- Timber joints 30mm discs set ( I recommend the cotter pin as it is easier. )
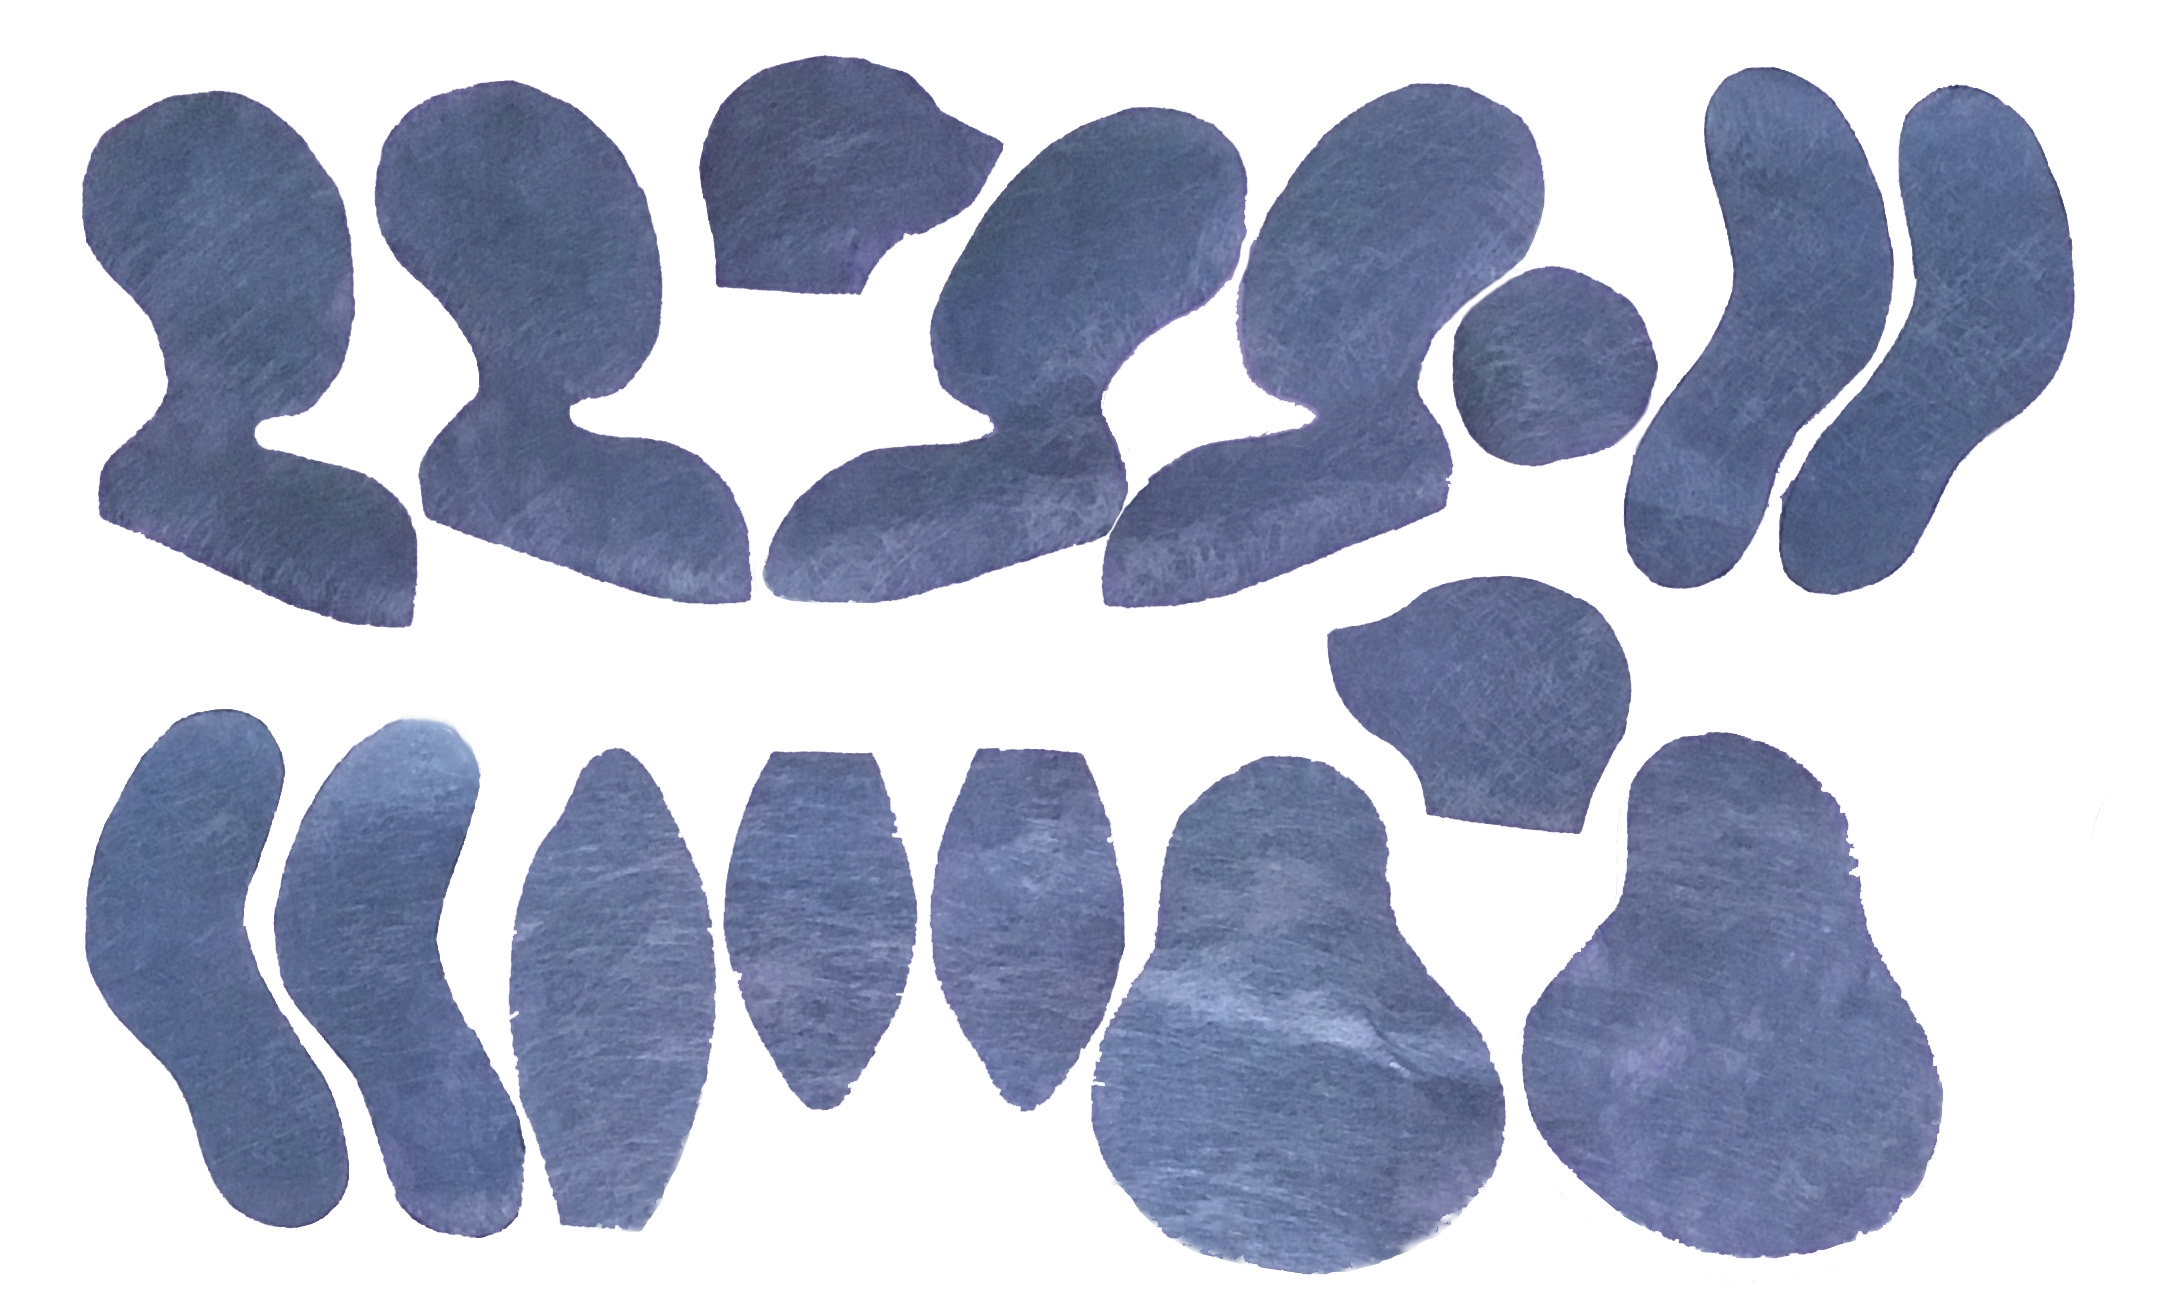
Photo copy the pattern and cut the pieces out. I recommend tracing the pattern on a piece of cardboard to preserve the template.
Please take notice: virtually all the pieces have REVERSE pieces.
 Let’s get started!
Lay your fabric out on a flat surface with the pile going down and start laying your pieces on the fabric. When using a contrasting fabric for the ears you will need 2 fur ears and 2 Reverse contrast ears. Contrast foot pads will be traced on the alternate fabric.
Play around a little with the pieces to work out how to get the most of your fabric. Once satisfied, trace around your template onto the fabric, matching the arrows to the pile of the fur. When adding the markers, place the marker on the outside of the pattern, this will prevent movement of the template. Once you have traced a piece onto the fabric, put the markers on the inside of the pattern, this way the markers are there after you cut your pieces.
It’s important to take care when cutting the fabric. Only the back should be cut. If you rush through this stage, there is a greater chance that you will cut the fur.
Using sharp scissors, carefully cut the fabric. At this point, I would trim/shave the nose area on the head gusset.
If you have chosen fur for the inner ear and foot pads then I would do those too.
Head
Pin the head sides pieces together from A to B – tucking the fur in as you go, this will make sewing easier. Then sew.
Now pin the head gusset in place A to B, sew one side of the head first from the nose down to the neck. Repeat for the other side, from nose to neck. Myself, I hand sew all my bears – sewing machines and I don’t get along very well. So, this part might be a little difficult for a novice, I would recommend a quick hand stitch around the nose area to keep the fabric in place, machine sew and then unpick your hand stitches. This will help to keep the face proportioned.
Turn head right side out and fill with stuffing. Loose fill for a toy or firm for a collectable – the choice is yours. Though as you are going to embroider a nose, a firmer fill in the nose area will make embroidering easier. Now using your upholstery cotton, sew a gathering stitch along the base of the neck opening. Pull the gathering threads without knotting, here you can test to see if your happy with the shape and the amount of filling in the head.
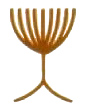
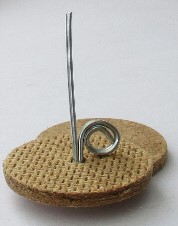
Timber joint
Slip the metal washer, then the timber disc onto the cotter pin. Put the head of the cotter pin and disc into the neck area, pull gathering stitch tightly close to the disc and knot very securely. You don’t want this knot to break or come loose, so I knot on one side of the pin, then the other side and repeat. Last thing you want is the head coming off. You should have most of the cotter pin sticking out. Put head aside for later.
 Body
Body
Pin the body together, using markers and sew from A to B and C to D. The gap between A and D is only small, it needs only to be a little bit bigger than the cotter pin, enough for movement. Keep the body inside out for later.
Arms
Same as body. Pin together using markers, sew from A to B. Leaving a gap for joint and stuffing.
Legs
Pin together using markers. Sew from A to B and C to D.
Foot pads – pin A foot pad to A leg piece. Once again, I would recommend a quick slip stitch or hand stitch if possible, a foot pad is very visible when the fur is brush away. You want a neat finish.
Jointing
You should have marked where the joints should go. You need to create a hole where the markers are. Preferably, you don’t want to cut the fabric, this is an area where movement will continuously occur, you don’t want to weaken the area. Using a skewing stick, gently push the point of the stick through the marker, leaving the threads in tack. Rotate the stick to enlarge the hole. Time to turn the piece right side out and insert your joint from inside the limb (this applies for both arms and legs). Once all the joints are in you can begin stuffing. Myself, I prefer to put a little filling in the area where the joints are first to ensure they don’t pop out. Finally ladder stitch the opening.
Ears
Pin together using the markers. If you’re a little worried about not getting the tips to meet perfectly, then I’d recommend sewing from B to A to B to A. Otherwise, if you’re confident, just sew from A to B to A. Turn right side out and stuff. Leave end open for now.
Face
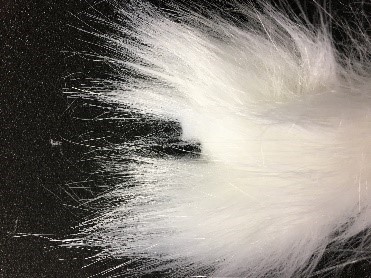
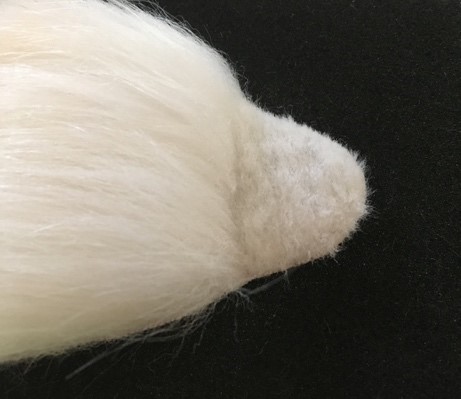
Ok, at this point you need to be very patient as this can be time consuming. You now need to separate the fur on the muzzle from the fur on the side of the head. Lie your head flat on the table with the nose pointing to the ceiling, gather the fur on the muzzle and brush it up away from the head fur, brush the head fur down. When looking from the top of the muzzle, you want to see a nice round circle. If it’s not quite round, use a skewing stick, large needle to shape the fur more accurately. As pictured below. Once happy with the shape, with shape scissors, trim the fur about 3mm wide between the face fur and muzzle. Next step is to trim the fur between points A and B, again around 3mm. Trim the area where the nose will be embroidered, you should be able to notice the rounding of the cheeks forming now. Turn the head around so you can trim where the mouth will be. Trim the same shape you made for the nose, this should give you your round shape for the cheeks.
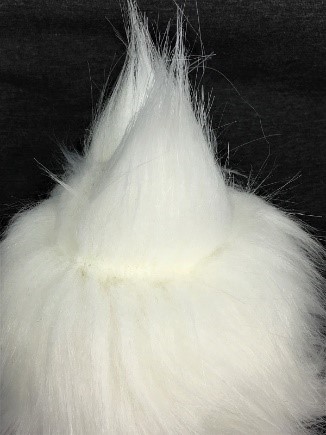

First step is to cut those peaks off the cheeks and start trimming, with very small snips until you have those puffy round cheeks. The closer you get to what you desire, the finer the snips. The pattern piece may help you here.
Nose
The nose shape can be your choice, some people like the square nose while other enjoy the triangle. Looking at my photo, a triangle shape would be more suitable. If you’re a novice to embroidery, I would make a template, make it a smaller than you want and position it on you rabbit face and trace it on lightly. Myself, I like to embroider the outline of the nose and then start embroidering from the centre to the sides. I feel that starting from the centre gives you a guide line, so you can work side to side until you have the desired finish. Myself, when finishing off my noses I like to exit on the left corner of the nose, run a long stitch along the top of the embroidered nose as an outline and enter in the right corner nose. This will give a neat finish to the top of the nose. Now you have entered the right nose, exit at the bottom tip for the nose and enter the needle into the seam about an inch down from nose and exit where you would like the mouth to end, then slide the needle under the embroidered stitch on the centre seam and enter the point the opposite side of the mouth. Using this technique you have a perfect finish in the middle and will make it easier for you to mirror the angle and length of the mouth. Now head back up to the closest corner of the nose, run a stitch under the nose and exit to the other corner of the nose, repeat and cut – this way the mouth won’t undo itself.

Eyes
Using the template for the eye backing, trace on the fabric you want closest to the eye and cut out. Using the marking on the template, use the doll needle to pierce the marking to make a hole for the eye and push the eyes into their backing. Check to see if you like the positioning. You may like to have a larger backing, this will make the bear look younger and more feminine – if that is what you’d prefer, just make a slightly larger circle temple, make it into a tear drop and repeat instructions. If you’d like the second backing. Just trace the template to a contrast fabric and pierce the hole higher than the marker, this will give you a small outline on the outside of the eye.
Glass eyes
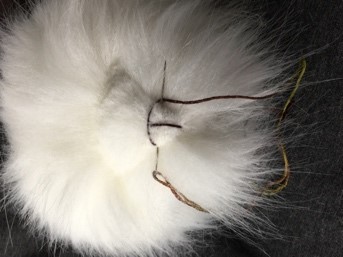
Time to get your upholstery cotton and cut a long piece. Thread one end into your hoop of your eye, repeat for the second eye. Using pins, preferably the ones with the coloured balls on the end, pin them into your bear to where you think you want your eyes. Do not position the in seam as this will weaken the area. Now check where you would like your ears to be positioned, once happy mark the spot with a pin. Using your use you doll needle with eye attached and enter your chosen position and exit on the opposite side of the head to where you marked your ear position. Remove one end of the thread from the needle and enter your needle in the same hole it just came out and exit 2mm left or right. This will separate the two threads making it possible to secure the eye with a tight knot. Repeat for the other eye. Check that the eye positions are correct and level, also checking the backings are in the right position. With everything in the right place, slightly push the eye in, pull your threads and knot tightly. Rethread your doll needle with both threads, enter where the knot is and exit on the other side of the head and cut thread.
Assembling
Nearly done! Take your skewing stick and create holes for the legs and arms. While the skewing stick is in the fabric, grab a pencil and mark the spot on the fur side, this will make finding the hole easier. Don’t worry the arm and legs will hide the marks – turn the body right side out. The head is the first piece to get attached as it is in a difficult spot to reach when everything is attached. Have your discs, washers and pliers ready. Push the head cotter pin through the top body opening, slip the timber disc on then the washer. Using your pliers, separate the two prongs of the pin. Take the pliers and firmly grasp the prong and begin to loop down until it touches the timber disc- this needs to be tight. Now loop the second prong. Repeat for arms and legs. Time to stuff the body and ladder stitch the back.
Ears
Feeling the side of your head, you should feel two dents where your eyes were knotted. These are the positions you marked for your ears. Pin your ears on and using your upholstery cotton sew the ears in place. Be aware, this will get messy as when you pull the cotton, you’ll drag in the fur. Keep brushing the fur away from the area you are working in as it is quite hard and annoying trying to pull the fur out when the cotton has been pulled tightly. Once the ear is sewn on, knot securely, enter the needle into the side of the head and out the other side, cut thread.
Tail
Download Pattern
Now for the final touch, take your tail piece and sew a gathering stitch around the edging with a long piece of upholstery cotton. Tighten but do not knot. Take some filling a stuff the tail, when happy, pull the threads, make one thread long and the short, pull tight, secure. Thread the short cotton into the needle and simply enter one end to the other and cut. Thread the long piece of cotton to needle. Pin tail into position sew tail on securely and knot. Enter needle into bunny, exit and cut.
And as a finishing touch, dress him/her with a ribbon.
Thank you
Have you picked up a copy of our magazine?
Available at Hervey Bay Stockland’s, Night Owl, Food n Groove, Maryborough Art Gallery, and various other newsagents throughout the Fraser Coast..
There’s more!
Recent Posts / View All Posts